Last Updated: October 25, 2026
Quick Summary
Fix gravel driveway ruts by finding the cause first, then rebuilding the layers. Shallow ruts under 2 inches can be fixed by redistributing existing gravel, while ruts 2 to 4 inches deep need fresh fill added in 2 to 3 inch lifts and compacted. Ruts over 4 inches mean subgrade or drainage failure, so you must dig out, rebuild the base, and fix the water.
- Tire tracks point to a base problem, while channels and washouts point to a water problem.
- Call 811 before digging to mark water, gas, and sewer lines.
- Measure rut depth with a straightedge and tape before choosing a repair method.
- Order about 10 percent extra material to cover spillage, overfill, and feathering.
- Squeeze a handful of mixed stone; it should clump slightly without dripping water.
Table of Contents
- Why Gravel Driveway Ruts Form (and Why Filling Blindly Fails)
- Assessing Rut Depth and Driveway Condition
- Step 1: Fill Shallow Ruts by Redistributing Existing Gravel
- Step 2: Repair Deep Ruts With Fresh Fill Material
- How to Fill Dips in a Gravel Driveway Without Creating New Low Spots
- Best Gravel for Driveway Repair: Matching Material to the Layer
- How to Compact Gravel Driveway Repairs So They Last
- Gravel Driveway Rut Prevention: Grading, Drainage, and Maintenance
- Frequently Asked Questions
Why Gravel Driveway Ruts Form (and Why Filling Blindly Fails)
Gravel driveway ruts are depressions worn into the driving surface where tires repeatedly press the stone down and push it sideways.
Here's why that happens. A rut is a symptom, not the problem. The real issue is almost always weak support underneath or water that has nowhere to go.
Filling without diagnosing is like painting over rot. The stone has nowhere solid to sit, so it disappears.
Reading the Rut: Tire Tracks vs. Drainage Channels
Not every depression means the same thing. Look at the shape before you grab a shovel.
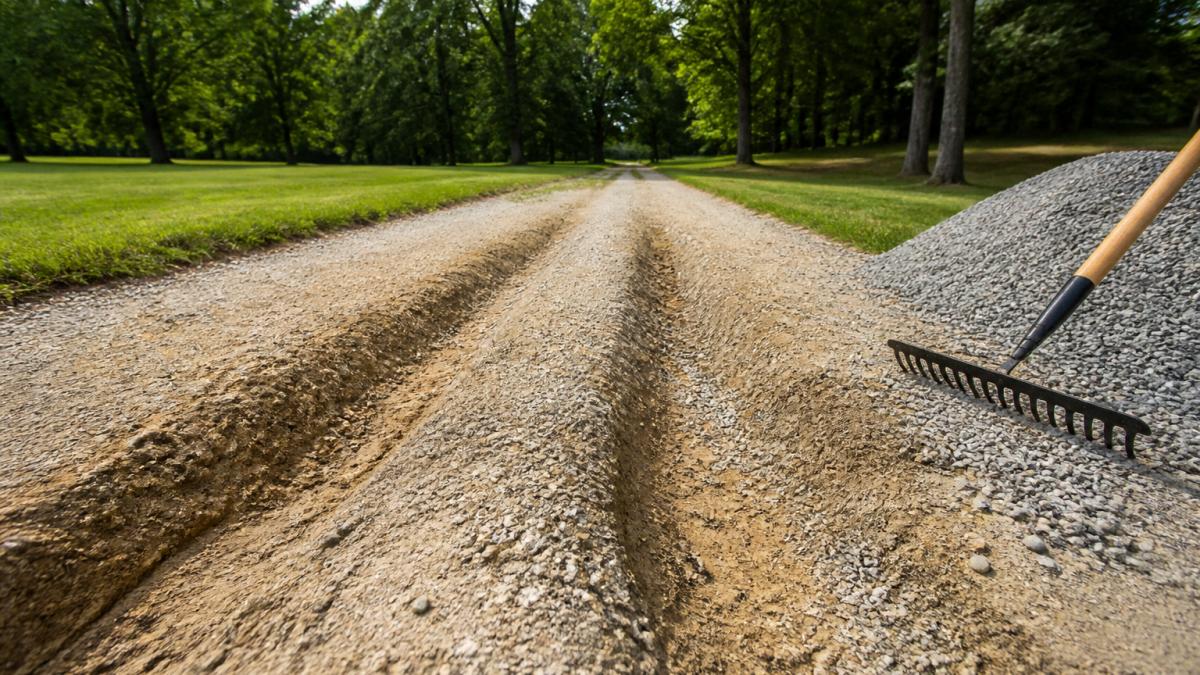
- Tire tracks: Two parallel grooves, even spacing, matching your wheel width. Cause: soft base, thin top layer, or heavy loads.
- Drainage channels: A single wide dip, often off-center or along the edge. Cause: water crossing the driveway and washing material away.
- Washouts: Sharp-edged gouges with exposed soil. Cause: concentrated runoff after heavy rain.
Tire tracks point to a base problem. Channels and washouts point to a water problem. Fix the wrong one and the rut returns.
Safety and Utility Checks Before You Dig
Before any shovel hits gravel, walk the driveway and check for buried hazards. A quick scan now saves you a broken line or a fine later.
- Mark the path of water, gas, and sewer lines (call 811 before digging) (811 Before You Dig)
- Note the location of sprinkler heads, drain tiles, and landscape lighting
- Check for low spots near the foundation or garage apron
Watch out: digging into an unmarked utility line is the one mistake on this list that can hurt you or cost thousands to repair. Always call 811 first.
Assessing Rut Depth and Driveway Condition
Measure before you spend. Rut depth tells you which repair method to use, and it takes about five minutes with a straightedge and a tape.
Lay a straight board across the rut and measure down to the lowest point. That number decides your approach.
| Rut Depth | What It Means | Repair Method |
|---|---|---|
| Under 2 inches | Surface wear only | Redistribute existing gravel |
| 2 to 4 inches | Base starting to fail | Add fill in lifts and compact |
| Over 4 inches | Subgrade or drainage failure | Dig out, rebuild base, fix water |
Also check the driveway width and crown. A flat or dished surface holds water. A proper crown sheds it to the edges.
Step 1: Fill Shallow Ruts by Redistributing Existing Gravel
Shallow ruts under 2 inches usually don't need new material. The stone is still there, just pushed to the edges. Pull it back.
- Wait for a dry stretch of weather. Wet gravel won't lock together.
- Use a landscape rake to pull stone from the high edges into the rut.
- Work along the rut, not across it, so you don't create new low spots.
- Overfill slightly, then rake smooth and level with the surrounding surface.
- Compact the repaired strip with a hand tamper or the tires of your vehicle.
This is the cheapest fix and often the only one you need for light tire tracking. It also tells you something useful: if the same rut comes back within weeks, the base underneath is failing and you need Step 2.
Step 2: Repair Deep Ruts With Fresh Fill Material
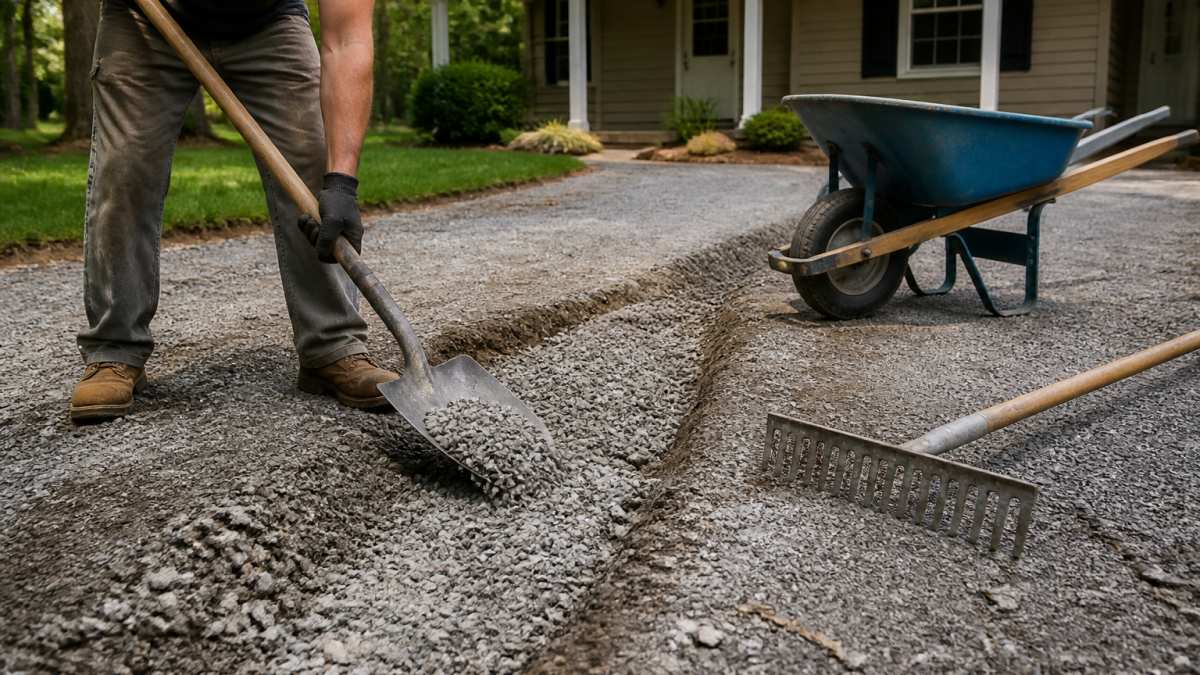
Deep ruts need new stone, added in thin layers and compacted as you go. Skip the layers and the fill sinks.
- Dig out the rut to solid, undisturbed material. Remove loose soil and soft stone.
- Shape the exposed base so it drains and matches the surrounding grade.
- Add base material in 2 to 3 inch lifts.
- Compact each lift before adding the next.
- Top with surface gravel and compact again.
If the ruts are deep and widespread, or the base has failed across the whole driveway, this is where most homeowners hand it off. Our gravel driveway repair and gravel spreading service handles the dig-out, fill, and compaction with real equipment. And before you buy material, it helps to know what gravel driveway repair actually costs per square foot so the quote makes sense.
How to Fill Dips in a Gravel Driveway Without Creating New Low Spots
Dips are different from ruts. A dip is a broad bowl; a rut is a narrow groove.
The fix is feathering. Add material in the center of the dip and taper it out to nothing at the edges.
- Fill in thin lifts, compacting between each
- Feather edges until they blend into the existing surface
- Check the crown after every lift with a straightedge
A dip that keeps coming back usually means water is crossing the driveway. Fix the drainage before you add another yard of stone.
Best Gravel for Driveway Repair: Matching Material to the Layer
Most repair guides say "use crushed stone" and stop there. That advice fails because base and surface layers do different jobs, and mixing them creates a repair that pumps, shifts, or sheds water into the wrong place. Match the material to the layer and the rut stops coming back.
Base Layer: Angular, Dense-Graded, and Load-Bearing
The base carries the vehicle load and spreads it into the subgrade. It needs angular faces that interlock under compaction, plus enough fines to fill the voids between larger stones.
- Crusher run (dense-grade aggregate): A blend of crushed stone and stone dust, typically with a top size around 3/4 inch down to fines. The fines act as a binder when damp and compacted. This is the standard base material for residential driveways.
- #57 crushed stone: Washed, single-size stone around 3/4 inch with no fines. It drains freely but does not lock up on its own, so it works as a drainage layer under a base, not as the base itself.
- Avoid rounded river rock: Smooth, rounded stones roll past each other under load instead of interlocking. A base built from rounded stone will rut again under the same traffic.
A common pattern in failed DIY repairs is topping a soft base with washed single-size stone. The new stone never locks, the base keeps deflecting, and the rut reappears within a season.
Surface Layer: Smaller, Still Angular, and Crown-Friendly
The surface layer sheds water, provides a smooth driving surface, and protects the base from tire scour. It should still be angular so it knits together, but smaller than the base stone.
- Top size around 3/8 to 3/4 inch: Small enough to grade smooth, large enough not to disappear into the base voids.
- Crusher fines or screenings: A fine, angular material that compacts into a tight surface. Good for the top inch on low-speed residential drives, but it can dust in dry weather and rut if the base below is weak.
- Keep the top layer thin: Roughly 1 to 2 inches over a sound base. A thick surface layer over a soft base is just a deeper rut waiting to happen.
Matching New Stone to What's Already There
Before you order, dig a small test hole in an undisturbed part of the driveway and look at the existing layers. Note the color, top size, and whether the stone has fines or is washed clean. Order the same or a compatible material for the layer you are repairing.
- Same layer, same material: If you are repairing the surface, use surface stone. If you are rebuilding the base, use base stone.
- Blending at the edges: Feather new stone into the existing surface so the transition does not become a low spot or a dam. A straightedge laid across the repair should show a smooth transition, not a lip.
- Do not cap a soft base with fines: Fines over a failing base look good for a month, then pump and rut. Fix the base first.
Once you know the layer and the material, order from a local source. Our gravel, dirt, and aggregate delivery service delivers crusher run, screenings, and other aggregate to homeowners and contractors.
How to Compact Gravel Driveway Repairs So They Last
Compaction is the step most DIY repairs skip, and it is the reason repairs fail. Loose stone stays loose, and loose stone sinks. But "compact it" is not enough instruction. The tool, the moisture, the lift thickness, and the number of passes all have to match.
Test Moisture Before You Compact
Bone-dry stone will not lock because the fines cannot bind. Soaking-wet stone will not compact because the water holds the particles apart and the material pumps under the compactor.
A simple field test: squeeze a handful of the mixed stone in your fist. It should clump slightly and hold its shape without dripping water. If it crumbles, add water in light passes with a hose and mix it in.
Match the Tool to the Lift
Lift thickness and compactor type have to work together. A thick lift under a light tool leaves loose stone at the bottom.
- Hand tamper: Best for small patches, shallow surface ruts, and tight spots against edges or structures. Keep lifts to about 1 to 2 inches.
- Plate compactor: The practical choice for most residential base repairs. Keep lifts to about 2 to 3 inches and make multiple passes. Rent one for a day rather than buying.
- Ride-on roller or vibratory roller: For larger repairs or full-driveway rebuilds. Lifts can go thicker, but only if the material and moisture are right. This is usually contractor territory.
Pass Counts and Lift Sequence
A workable sequence for a residential repair:
- Place the lift at the target thickness (2 to 3 inches for a plate compactor).
- Make two to three overlapping passes over the entire lift, moving slowly.
- Check the surface with a straightedge and a hand probe. Spongy spots mean the lift is too thick or the moisture is wrong.
- Scarify the surface lightly before the next lift so the layers bond instead of sitting as separate slabs.
- Repeat until the repair is flush with the surrounding grade, then compact the final surface.
If the surface still feels spongy after compaction, the layer is too thick or the base below is soft. Do not add more stone on top. Dig out the soft spot and rebuild it.
Edges and Transitions
Compaction at the edges of a repair is where many jobs fail. The edge of the patch is a weak plane, and water finds it. Taper the new material into the existing surface, compact the transition zone with extra passes, and make sure the repaired area still drains toward the shoulder, not into the patch.
When a repair needs real grading or excavation, our dirt work, grading, and small excavation service brings the equipment to do it right.
Gravel Driveway Rut Prevention: Grading, Drainage, and Maintenance
Prevention comes down to two things: keep water off the surface and keep the crown intact. Most gravel driveway ruts start with water, not traffic.
Grading and crowning. Regrade the surface so it crowns in the middle and sheds water to the edges.
Drainage. Add a shallow ditch or swale along the edges, and make sure runoff has somewhere to go.
Maintenance schedule. Rake and regrade lightly each spring, top up thin spots, and compact any soft patches before they become ruts.
If standing water or a bad slope is the root cause, a proper regrade is the long-term fix. Our step-by-step yard grading guide walks through measuring slope and moving soil so water drains away from your driveway and foundation.
Frequently Asked Questions
What tools do you need to repair ruts in a gravel driveway?
For shallow ruts you can get by with a sturdy garden rake, a shovel, and a hand tamper. Deeper repairs call for a wheelbarrow, a plate compactor, and enough fill material to rebuild the base in layers. A straightedge or a long board helps you check the crown and confirm the surface is level across the driveway width. If the ruts run several inches deep across a long stretch, a skid steer or box blade speeds up grading considerably.
Should you add new gravel when fixing driveway ruts?
Not always. Ruts under about 2 inches deep often close up when you rake the displaced gravel back into the low spot and compact it. Deeper ruts mean material has been pushed out or washed away, so you need fresh aggregate to rebuild the layer. Add it in 2 to 3 inch lifts and compact each one before the next. Topping a deep rut with a single thick dump of gravel leaves a soft pocket that re-forms within weeks.
How do you compact gravel after filling ruts?
Compact in thin layers, not all at once. Spread 2 to 3 inches of fill, dampen it lightly, then run a plate compactor over it in overlapping passes until the stone stops shifting underfoot. Repeat for each lift until the repaired area sits flush with the surrounding surface. Moisture helps the fines bind, but saturated ground will pump and never tighten up, so wait for a dry stretch after rainfall before you compact.
How can you prevent ruts and washouts from coming back?
Fix the water first. Ruts that return every season usually trace back to drainage: a flat or inward-sloping surface, a clogged ditch, or a missing culvert. Maintain a crown of roughly 2 to 3 percent so water sheds to the sides, keep shoulders and ditches clear, and regrade before ruts deepen past an inch or two. Limiting heavy traffic during wet periods and topping up gravel annually also stretch the life of the surface.
Ruts in a gravel driveway will keep coming back until the base and drainage are fixed, and that's the part most homeowners can't do by hand. At NexGen Dirt & Haul, we handle driveway repairs, grading, and aggregate delivery with real equipment and straightforward pricing. Text us a photo of your driveway, and we'll send back a clear quote with no runaround. Get started with NexGen Dirt & Haul and get your driveway back to a smooth, solid surface.
