Last Updated: October 26, 2026
Quick Summary
To prepare a backyard for a shed, pick a flat site that drains away from the house, then check setbacks, permits, HOA rules, and call 811 before you dig. Mark the footprint, clear vegetation and debris, level and compact the ground, build a suitable foundation, and plan drainage so water runs away from the base.
- Verify setbacks with your city or county building department before marking anything on the lot.
- Many areas exempt small sheds under roughly 100 to 200 square feet or under 10 feet tall.
- Add 6 to 12 inches on each side of the shed dimensions for the gravel base.
- Compact fill in 2 to 4 inch layers, since loose fill settles and compacted fill holds.
- A small 8x10 garden shed can sit on a 4-inch compacted gravel pad.
Table of Contents
- Step 1: Pick the Site and Check Local Rules
- Step 2: Measure and Mark the Shed Footprint
- Step 3: Clear Vegetation, Debris, and Old Concrete
- Step 4: How to Level Ground for a Shed
- Step 5: Shed Foundation Ideas That Fit Your Soil and Shed Size
- Step 6: Build a Gravel Pad for Shed Stability
- Step 7: Plan Shed Site Drainage and Runoff
- Book Your Site Prep and Hauling Quote
- Frequently Asked Questions
Step 1: Pick the Site and Check Local Rules
The best backyard for a shed is flat, drains away from the house, and leaves you room to work. Most homeowners pick the site by eye and skip the rules. That is where projects stall.
On small lots, a good location can often be hampered by a bad setback or a permit problem that stops work cold. So before you touch a shovel, answer three questions.
Setbacks, Permits, and Utility Locates
Setbacks are the minimum distances a shed must sit from property lines, easements, and other structures. Your local building department sets them, and they vary by lot and zone.
- Check setbacks with your city or county building department before you mark anything. Ask specifically about side, rear, and front-yard setbacks, and whether corner lots have different rules.
- Ask about permits. Many areas exempt small sheds under a certain square footage or height, often 100 to 200 square feet or under 10 feet tall, but thresholds differ by jurisdiction. Ask what triggers a permit and what inspections are required.
- Review easements and utility rights-of-way. A shed placed over a sewer easement or utility right-of-way can be ordered removed at your expense. Your plat map or deed often shows these.
- Check HOA and deed restrictions. Neighborhood associations may cap shed size, color, roof style, or placement even where the city allows it. Get approval in writing before you build.
- Call 811 before you dig (811 Before You Dig). This free service marks underground utilities so you do not hit a water, gas, or power line (Call Before You Dig! | Stakeholder Communications). Give them a few business days.
The 811 Call Before You Dig service connects you to local utility locators. Give them a few business days. Even if you are only driving stakes a few inches deep, locate first, shallow irrigation lines, landscape wiring, and fiber runs are easy to hit.
Delivery and Access Check
Before you commit to a site, walk the delivery route. Measure gate width, overhead clearance under branches or wires, and turning space for a truck or trailer. A shed that fits the yard but not the gate is a costly problem. Most installers need a clear path at least as wide as the shed plus a foot or two on each side, and firm ground for the truck.
If access is tight, note it now, it may change your foundation choice or push you toward an on-site build rather than a delivered unit.
Step 2: Measure and Mark the Shed Footprint
The shed footprint is the exact rectangle the building will cover, plus a little extra for the base. Measure twice, mark once.
- Measure the shed's outside dimensions from the manufacturer's specs.
- Add 6 to 12 inches on each side for the gravel base.
- Drive stakes at all four corners.
- Run string between the stakes.
- Check that both diagonals match. Equal diagonals mean square corners.
A footprint that is out of square will fight you through every later step. Fix it now while it is just string and stakes.
Step 3: Clear Vegetation, Debris, and Old Concrete
Clear everything inside the marked area: grass, weeds, roots, rocks, and any old concrete slabs. Roots left in place will rot and settle, and your shed will follow them down.
Rent a walk-behind cutter for thick brush, or cut it by hand on small jobs. Break up concrete with a sledge or a small breaker, then haul it out.
If the overgrowth is more than you want to handle, brush removal and small-lot clearing covers exactly this kind of cleanup. And once the pile is built, junk removal and debris hauling gets it off your property.
Watch out: buried concrete or old footings under the grass will wreck your grading. Dig a few test holes before you start.
Step 4: How to Level Ground for a Shed
Level ground is the whole ballgame. A shed on uneven dirt will rock, twist, and crack over time. Learning how to level ground for a shed comes down to cutting high spots, filling low spots, and compacting in thin lifts.
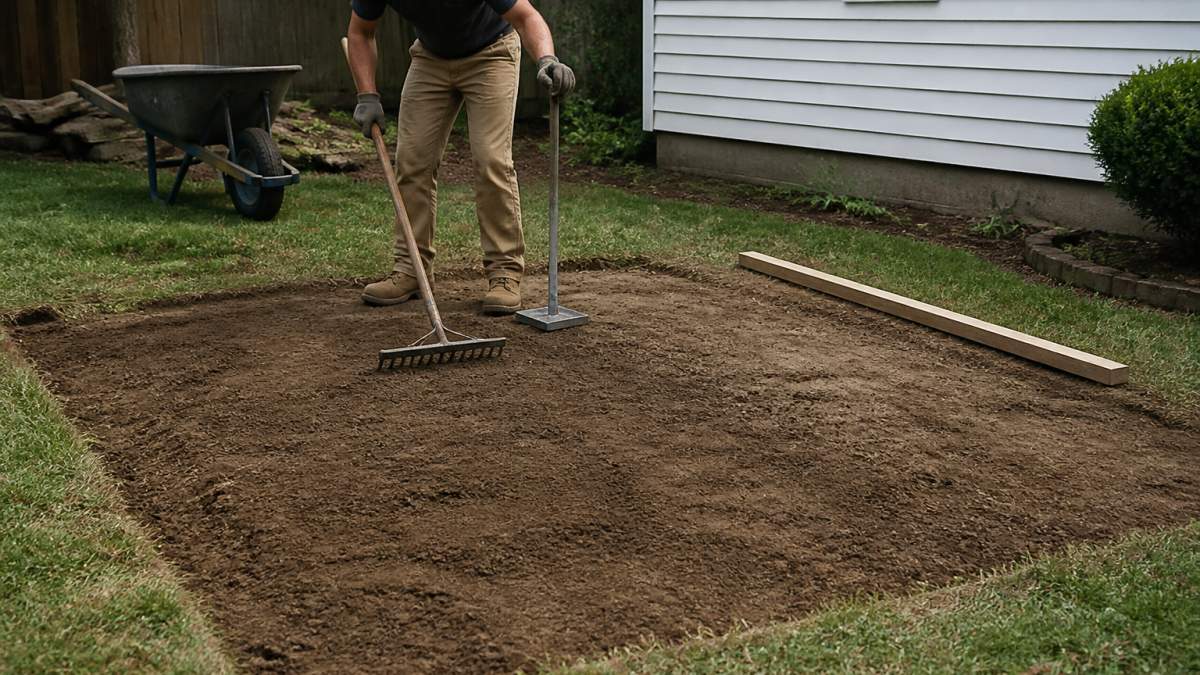
Start by stripping the topsoil. Then use a long straightedge and a level to find the high and low spots across the footprint.
Checking Slope and Compacting Soil
A shed base should be level, with a slight slope for drainage. Check slope with a string level or a straightedge and a spirit level.
- Cut high spots with a shovel or a rake.
- Fill low spots with crushed stone, not loose topsoil.
- Compact in lifts. Add soil or stone in 2 to 4 inch layers and tamp each one.
Loose fill settles. Compacted fill holds. That difference decides whether your floor frame stays flat.
If drainage is your bigger worry, our guide on how to grade a yard for drainage walks through slope measurement and standing water fixes. And if you would rather hand off the whole job, dirt work, grading, and small excavation is what we do.
Step 5: Shed Foundation Ideas That Fit Your Soil and Shed Size
The right shed foundation ideas depend on three things: your soil, your shed size, and what you plan to store inside. A light 8x10 garden shed and a heavy workshop with tools need different bases. Most guides present leveling as one-size-fits-all; it is not. Match the base to the load and the ground under it.
| Foundation Type | Best For | Soil Fit | Watch Out For |
|---|---|---|---|
| Gravel pad | Small to mid sheds, most uses | Well-drained, firm soil | Needs a border to hold stone |
| Concrete blocks on gravel | Small sheds, budget builds | Stable, level soil | Blocks shift on soft ground |
| Pavers | Light sheds, patios | Firm, drained soil | Settle under heavy loads |
| Concrete slab | Heavy sheds, workshops | Any soil with proper base | Highest cost and effort |
| Screw piles or posts | Sloped or soft ground | Poor or uneven soil | Requires accurate placement |
Check your shed maker's manual first. Many specify a base type, and using the wrong one can void the warranty.
Matching the Base to Soil, Size, and Use
Soil matters most. Sandy or gravelly soil drains well and compacts firmly, a gravel pad or blocks often work. Clay soil holds water and shifts with freeze-thaw; it needs a deeper base, better drainage, or a slab.
Shed size and load drive thickness. A small 8x10 garden shed storing lawn tools can sit on a 4-inch compacted gravel pad.
Use changes the answer. Storage sheds tolerate slight movement better than workshops with precision tools. If you plan to add electricity, a slab or a post foundation with a raised floor makes wiring easier.
Concrete Blocks, Pavers, and Posts
Concrete blocks sit on a compacted gravel bed and raise the shed off the dirt. Pavers work the same way on a smaller scale. Foundation posts go deeper and suit sloped or soft ground, where a flat pad would wash out.
For most sheds on a backyard for a shed on firm soil, a gravel pad is the simplest base that lasts. It drains well, spreads the load, and costs less than a slab. On soft or sloped ground, posts or piles are worth the extra effort because they reach stable soil instead of floating on top.
Step 6: Build a Gravel Pad for Shed Stability
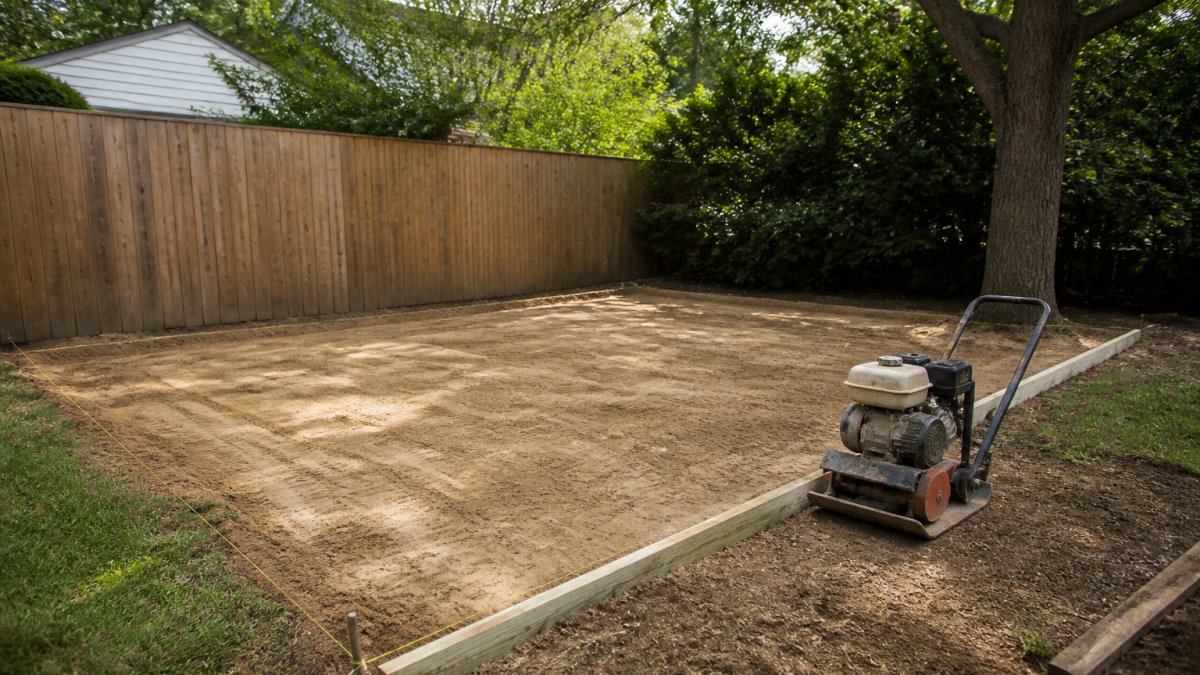
A gravel pad for a shed is a compacted layer of crushed stone that spreads the shed's weight and keeps the floor dry. Build it in layers, not one dump.
- Frame the footprint with pressure-treated lumber or edging.
- Lay a weed barrier over the bare soil.
- Add 2 to 3 inches of coarse crushed stone.
- Compact it with a plate compactor.
- Add a second lift and compact again.
- Screed the top flat with a straightedge.
For the stone itself, gravel, dirt, and aggregate delivery brings the right material to your driveway. Ask for crushed stone with fines. It locks together when compacted and holds its shape.
Step 7: Plan Shed Site Drainage and Runoff
Shed site drainage is the step most people skip, and it is the one that causes the most callbacks. Water that pools against the base will work under the pad and soften it.
- Slope the finished pad slightly away from the shed.
- Keep the shed's roofline draining away from the base.
- Add a shallow swale or gravel trench on the uphill side.
- Never let downspouts dump next to the pad.
Water runoff from a neighbor's yard or a slope above you needs a plan too. Divert it around the shed, not into it. A little grading now saves a muddy mess later.
Book Your Site Prep and Hauling Quote
Seven steps, and most of them involve moving dirt or hauling debris. That is the part we handle.
At NexGen Dirt & Haul, we do small-scale site prep, grading, and cleanup for homeowners and contractors. Our quote process is simple: text a photo of your project and get clear, honest pricing without the runaround. We bring real equipment, so the job gets done right the first time.
Get started with NexGen Dirt & Haul and hand off the dirt work, debris, and leveling so your shed goes up on solid ground.
Frequently Asked Questions
How level does the ground need to be for a shed?
A shed base should sit within about 1 inch of level across the full footprint for most wood and metal sheds, and tighter for larger units. Small dips cause the floor frame to flex, doors to stick, and water to pool against the walls. Check level with a long straightedge and a spirit level in several directions, not just front to back. If the ground is off by more than a couple of inches, grade and compact it before building.
What is the best base for a backyard shed?
The best base depends on soil, shed size, and use. A compacted gravel pad suits most backyard sheds and drains well. Concrete blocks or pavers on compacted soil work for smaller units and tighter budgets. A poured concrete slab makes sense for heavy equipment or a shed that will be permitted as a permanent structure. Whatever you choose, the base has to be level, compacted, and slightly above the surrounding ground so shed site drainage moves water away.
Can you put a shed directly on grass?
You can, but it will not stay put. Grass and topsoil compress under the weight, so the shed settles unevenly within a season or two. Moisture trapped under the floor rots wood framing and rusts metal. Strip the sod, remove soft topsoil, and build on compacted soil or a gravel pad instead. Clearing vegetation and debris is one of the seven steps to prepare a backyard for a shed, and skipping it is the most common reason sheds shift.
How do you keep water from pooling around a shed?
Grade the ground so it slopes away from the shed on all sides, typically about 1 inch per foot for the first few feet. Set the base slightly above surrounding grade, and add a gravel apron or French drain on the uphill side if runoff collects there. Keep gutters and downspouts pointed away from the footprint. If your yard already holds standing water after rain, fix the grading before the shed goes in, not after.
